
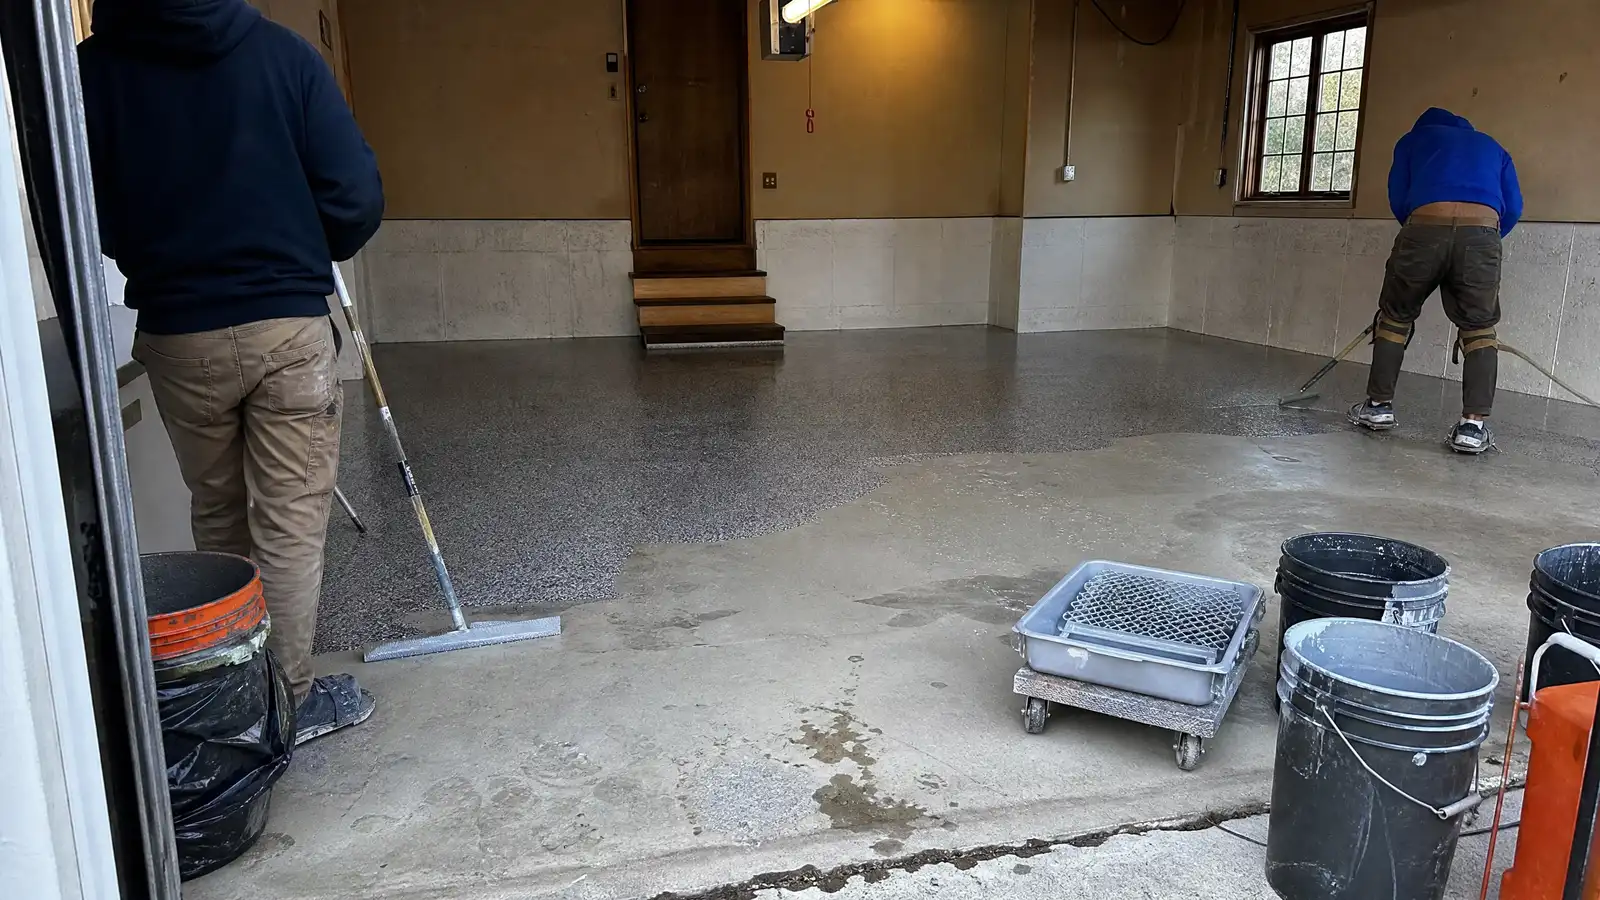
Epoxy Basement Floor in Sumter, SC: A Clean Finish That Stays Down
Basement Epoxy Floors in Sumter County, SC: moisture-tested prep and a durable, easy-to-clean finish that holds up to humid summers. Call for a quote.
A basement slab that sweats, stains or flakes paint is frustrating, and nobody wants to pay for a new coating that peels in a year. Sumter Epoxy Floors installs an epoxy basement floor across Sumter County, SC, with the prep and moisture checks that decide whether a coating holds. Basements are different from garages because the slab sits against the ground and moisture moves through it. We test first, fix what needs fixing, then coat. You get a free on-site estimate and a written quote, so you know the plan before any work starts.

Understanding How a Basement Coating Works
Epoxy is a two-part resin. Mixed together, it hardens into a tough, bonded layer on concrete. It does not sit on top like paint. A good system has three parts: a prepared slab, a primer or moisture barrier where the slab needs one, and one or more finish coats.
Basements add one challenge: water vapor. Concrete is porous, and ground moisture can travel upward through it, even when the floor looks dry. In Sumter’s humid subtropical climate, with average daily highs of 87.3°F in June, 90.2°F in July and 88.5°F in August (Wikipedia, Sumter, South Carolina), warm, damp air meeting a cool slab can add to the problem. Most coating failures trace back to prep and moisture, not the epoxy itself.
Who Gets the Most From a Basement Floor Coating
- Homeowners finishing a basement for a gym, playroom, workshop or storage area
- Households tired of dusty, stained or chalky bare concrete
- Owners of older slabs with faded paint that keeps lifting
- Shaw AFB families and others settling into a new home who want a usable lower level
- Small business owners with a basement stockroom, shop or back-of-house area
We serve Sumter, Shaw AFB neighbors, and nearby towns along US 15, US 76/378 and SC 441.
Moisture Testing: The Step That Protects Your Money
Moisture testing measures how much water vapor is moving through your slab before anything gets coated. It is for every basement floor, and it is the best protection against bubbling and peeling.
Two methods are common. The ASTM F2170 in-situ relative humidity test places probes at about 40 percent of slab depth for slabs that dry from one side, or 20 percent when they dry from both sides (Wikipedia, Epoxy moisture control system). A basement slab typically dries from the top only. The ASTM F1869 calcium chloride test measures vapor emission from only the top quarter inch of the slab, so it can miss deeper moisture (Construction Canada).
Typical epoxy coatings call for slab relative humidity of 75 percent or lower, but the coating maker’s data sheet sets the real limit for each product (One Stop Epoxy). We read that sheet and compare it with the test result.
Your benefit: you learn whether the slab is ready, needs a barrier primer, or needs time to dry, before you spend on the finish. We explain the results in plain terms.
Vapor Control Primers: A Barrier Under the Color
A vapor control primer is a specialty epoxy layer that slows moisture moving up through the slab, so the finish coat has a stable surface to bond to. It suits basements where testing shows elevated moisture, where the slab has no reliable vapor barrier beneath it, or where past coatings have bubbled.
Some coatings are less forgiving than others. Polyaspartic coatings should not go on a slab with a high moisture vapor emission rate, because moisture can make the coating bubble up and lift (Concrete Network). That is one reason we choose the system after testing, not before.
A primer is not a cure-all. A slab with active water intrusion, such as a leaking wall joint or poor exterior drainage, needs that problem addressed first. We will tell you if that is the case rather than coat over it.
Your benefit: a barrier layer gives the floor a better chance of staying bonded through humid summers. It is added only when your test results call for it.
Finishing and Color: Making the Floor Look Finished
Once the slab is prepared and primed, the finish layer sets the look and feel. Options include solid colors, decorative color flakes that hide dust and small marks, and metallic effects for a more custom look. A clear topcoat can add wear resistance and make cleaning easier.
Texture matters in a basement, where spills and laundry-area splashes happen. A fine grit can be added for traction, which supports the slip-resistance goals found in OSHA 29 CFR 1910.22 for walking-working surfaces. Glossy, smooth floors look sharp but can be slick when wet, so we talk through the trade-off.
Color choice also affects light. Basements often have little daylight, and a lighter gray or tan tone bounces light around a room. Darker colors show dust and footprints more than flake blends.
Your benefit: a floor that suits how you use the space, cleans with a mop, and looks good under artificial light. Bring paint chips or photos to the estimate visit.
Step by Step: From Estimate to Finished Floor
- Free on-site estimate. We look at the slab, ask about past water problems, and take measurements. You get a written quote.
- Moisture testing. We test the concrete and review the results against the coating’s data sheet.
- Surface preparation. We grind the slab, following the profile guidance in ICRI Guideline 310.2R, to remove old paint, sealers and weak surface material. Cracks and chips are repaired, and dust is cleaned up.
- Primer. A standard bonding primer or a vapor control primer goes down, depending on the test.
- Color and finish coats. Flakes or metallic effects are applied, followed by a clear topcoat.
- Walkthrough. We review the floor with you and explain curing and care.
What You’ll Gain
- Durability: a bonded coating resists foot traffic, rolling carts and stored items
- Easy cleaning: a sealed surface stops the dust that bare concrete sheds
- Resistance to stains: oil, laundry products and paint are easier to wipe up
- Better appearance: a uniform, finished look in place of patchy gray concrete
- Safer footing: texture options help with wet-area traction
Investment Guide: What Drives the Price
Epoxy flooring typically costs $2 to $12 per square foot installed, materials and labor included (Angi, updated Aug 3, 2026). Professionally installed epoxy totals about $6 to $15 per square foot, against DIY materials at about $2 to $5 per square foot (Intermountain Coatings, July 2025). Water-based epoxy runs about $3 to $7 per square foot, 100% solids epoxy $5 to $12, and metallic epoxy $8 to $15 (Intermountain Coatings, July 2025).
Prep changes the total. Basic cleaning and etching adds about $1 to $2 per square foot, diamond grinding for damaged concrete about $2 to $4, and crack repair and patching about $3 to $5 (Intermountain Coatings, July 2025). A vapor control primer will add to the quote when testing calls for one.
For scale, a typical epoxy price for a two-car garage of about 500 square feet is $1,500 to $6,000 (Angi, updated Aug 3, 2026). Basements vary widely in size, so use that as a reference point only. Your written quote will be for your actual slab.
Also, under South Carolina regulation 106-2, a licensed residential specialty contractor must hold a surety bond of at least $10,000 when a project costs more than $5,000 (South Carolina Code of Regulations ch. 106). Ask any contractor you compare about licensing and bonding.
The estimate visit usually takes a short time. We check the slab, discuss color, and explain what testing is needed. Timeline depends on slab condition, cure time and test results, and we confirm it in writing.
Questions Homeowners Ask
Do I need moisture testing before epoxy goes in a basement?
Yes. Basement slabs sit against the ground and can pass water vapor even when they look dry. Testing, such as ASTM F2170 relative humidity probes, shows whether the slab is within the coating maker’s limits. Skipping it risks bubbling and peeling, which is the most common reason coatings fail.
Can epoxy go over old paint or cracked concrete?
Usually not directly. Old paint and sealers are ground off so the epoxy can bond to bare concrete. Cracks are cleaned and filled first. Small, stable cracks are routine to repair. If a crack is moving or leaking water, we will tell you what to fix before coating.
How long does an epoxy basement floor last?
It depends on prep, moisture control and use. Installers describe polyaspartic coatings as lasting 15 to 25 years with care, though these are manufacturer and installer claims, not independent test results (Concrete Network). Epoxy durability varies by product, so ask for the data sheet and care instructions.
Is epoxy slippery when wet?
A smooth, glossy epoxy can be slick when wet. For basements near a laundry area or sump, we can add a fine grit or choose a textured flake finish for better traction. It is a trade-off between a polished look and grip, and we discuss it during the estimate.
How long before I can use the floor?
Cure times depend on the product, temperature and humidity. Most systems allow light foot traffic before heavy use or furniture. We give you the exact timing for your product in writing, because the data sheet sets it. Keeping the area clear until then helps the coating cure properly.
Ready to Talk About Your Basement Floor?
If your slab is stained, dusty or peeling, we can look at it, test it and give you a clear written quote. Estimates are free and we are based right here in Sumter County, so visits and any follow-up are close to home. Choose Get a Free Estimate or call (839) 600-9293.
How It Works
From first call to a floor you can drive on
Free on-site estimate
We look at the floor, check for cracks, stains and old coatings, and talk through color and finish.
Written quote
You get one clear quote listing the prep, the coating system and the days the work takes.
Grind and repair
We diamond-grind the concrete, fill cracks and joints, and clean the surface before any coating goes on.
Coat and finish
We apply the coating system in stages and finish with the color and texture you chose.
Related Guides
Helpful articles to learn more about this service.
Ready for a floor that lasts?
Tell us about your garage, patio or shop floor. We reply with a written estimate and explain exactly how the concrete will be prepared.